

A reed roof used to mean a master thatcher, a barn full of bundles and weeks of patient work. ONETHATCH REED changes that. Its moulded panels bring the fine, combed look of Cape reed and water reed, and synthetic reed thatch installation is screw-fixing work that a skilled roofer or carpenter can plan, price and complete with confidence.
This guide walks through the method from deck to ridge, using the REED specification. For screw positions and piece-by-piece details, keep the ONETHATCH REED installation manual (PDF) on site, and our team will check the details against your drawings.
Before you start: what synthetic reed thatch installation needs
Every REED roof is built from the same four ingredients: the right pitch, a solid deck, the right spacing and the right screws.
| Item | REED specification |
|---|---|
| Field panel size | 1000 × 500 mm |
| Coverage | About 5 panels per m² |
| Course spacing | 200 mm / 8 in |
| Fixing | Four stainless screws per panel |
| Substrate | Solid sub-deck |
| Minimum pitch | From 18° |
| Pieces | Eave, starter, field, hip & ridge |
| Finishes | Sundried, Aged |
Order all four piece types together, in one finish, so the colour matches from eave to ridge. Send us your roof drawings and check the quantities of eave, starter, field and hip & ridge pieces with your quote, so nothing runs short on site.
Step 1: Check the pitch and the structure
Start with the frame. REED works from an 18° pitch, far lower than a natural reed roof, which opens up canopies, pavilions and wide lapas. Your engineer designs the rafters and connections for local wind and building loads; the thatch is the finish, the structure does the work.
Step 2: Lay the solid sub-deck
REED always goes over a solid sub-deck, never open battens. The deck gives every screw a firm bite and gives the roof a continuous base beneath the reed texture. Lay it flat and true, with joints supported, so the courses run straight.
Step 3: Set out the courses at 200 mm
Mark horizontal lines across the deck at 200 mm / 8 in spacing, working up from the eave. Straight, evenly spaced lines are what make the finished roof look like one continuous, combed reed surface rather than a set of panels.
Step 4: Fix the eave pieces
The eave is the line every guest sees first, so it sets the tone. Fix the eave pieces along the bottom edge of the roof to give the thick, rounded edge of a traditional reed roof.
Step 5: Add the starter course
The starter pieces go on next, above the eave, so the first full course of field panels sits at the correct angle and depth.
Step 6: Lay the field panels
Now the roof comes to life. Lay the 1000 × 500 mm field panels course by course on your 200 mm lines, working from the eave up towards the ridge. Fix each panel with four stainless screws into the solid deck. Stagger the joints from one course to the next, as you would with any shingle roof, so no seam lines up down the slope.
Keep a sample panel at ground level and step back every few courses: the finer the reed texture looks from the garden, the better the job.
Step 7: Finish the hips and ridge
Hip & ridge pieces give a reed roof its crowning line. Fix them along every hip and over the ridge, covering the top edges of the field panels, so the peak looks as full and finished as the slopes.
Step 8: Inspect and hand over
Walk the roof line from below. Check that every course is straight, every panel has its four screws, the eave reads as one even edge and the hips and ridge sit tight. Clear off drill dust and offcuts, and register the roof for the 20-year limited warranty.
Common mistakes to avoid
- Installing on open battens. REED is a solid-deck product. Open battens are for ONETHATCH PALM only.
- Roofing below 18°. Keep to the minimum pitch.
- Skipping screws. Four stainless screws per panel, every panel.
- Mixing finishes or batches. Order Sundried or Aged for the whole roof at once.
- Wandering courses. Snap your 200 mm lines before the first panel goes on.
Building on the coast
Reed roofs love the seaside, and so does REED. The panels are UV-stabilised HDPE with the colour compounded right through, and they passed 5,000 hours of ASTM G155 accelerated weathering with no significant colour change. Stainless screws hold up to salt air where ordinary steel would stain and corrode. Once the last ridge piece is on, care is simple: an occasional rinse to wash off salt and dust, and a look along the courses after a big storm.
Fire-rated projects
If your project needs a fire rating, order the FR version of REED, which is rated Class A to ASTM E108 (Intertek report 220927005SHF-001). The fire retardant is built into the material, so there is nothing to re-spray. The standard NFR version has no fire rating. A fire rating applies to the assembly that was tested, so install it exactly as the tested assembly; ask us for those details.
Synthetic reed thatch installation: questions buyers ask
Can I install synthetic reed thatch myself?
A skilled DIY builder can, but we recommend a roofer or carpenter. The work is screw fixing on a solid deck, not traditional thatching, so no thatcher is needed; what matters is a true deck, straight 200 mm courses and four stainless screws per panel.
Does synthetic reed go on battens or a solid deck?
A solid deck, always. REED panels are fixed over a solid sub-deck; only ONETHATCH PALM (NIPA, FAN, RAINCAPE) is designed for open battens. The batten method is covered in our PALM installation guide.
What is the minimum pitch for synthetic reed thatch?
REED can be installed from an 18° pitch. That is much lower than natural reed, which needs a steep roof to shed rain, so REED can also cover porch canopies and low pavilions.
How many synthetic reed panels do I need per square metre?
About 5 field panels per m² at 200 mm spacing, plus eave, starter and hip & ridge pieces. Send your drawings and check the exact quantities with your quote.
How are the eaves and ridges finished?
With dedicated pieces. Eave and starter pieces build the thick, rounded bottom edge, and hip & ridge pieces cap every hip and the ridge, so the roof looks complete from every side.
Ready to build your reed roof?
Send us your roof drawings for a full panel count and free samples in Sundried and Aged. Explore ONETHATCH REED synthetic reed thatch, and read our guide to synthetic reed thatch roofs and the Reetdach and lapa look.
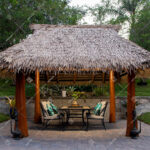 7 reasons to choose synthetic palm thatch
 Kenninji-Gaki, the classic Japanese bamboo fence
 How to install ONETHATCH PALM (NIPA), step by step
 English
 Japanese
 Arabic
 Spanish
 French
 Portuguese
 Italian
 German
 Chinese (China)
 Thai
 Vietnamese
 Indonesian
 Korean
 Chinese (Taiwan)
 Russian